Tracking Billable Time
When tracking time on a project, Workzone can also track projects with and without billable time. This detail is particularly useful when tracking a mix of internal projects and projects for clients or other external parties.
Workzone has a checkbox that can designate a project as Billable (checked) or Not Billable (unchecked) when creating a project, and you can also edit an existing project to change its Billable designation. By default, all projects are designated as Billable unless user action is taken to change the project otherwise.
During project creation, the billable designation of a new project is found in the “Add additional information (optional)” drop down in the Add Project frame as seen here:

For existing projects, clicking the 3 vertical dots dropdown from the main Task List will display the “Edit Project” line in the dropdown. Clicking that option…

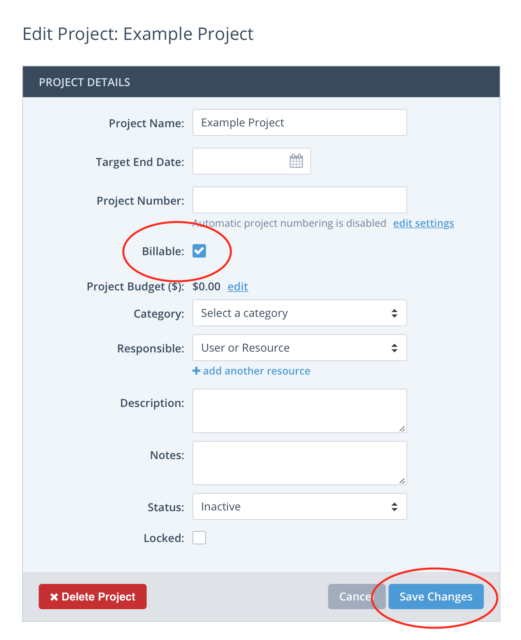
….displays a page where you can select the Billable checkbox and change that value, then click the blue “Save Changes” button.
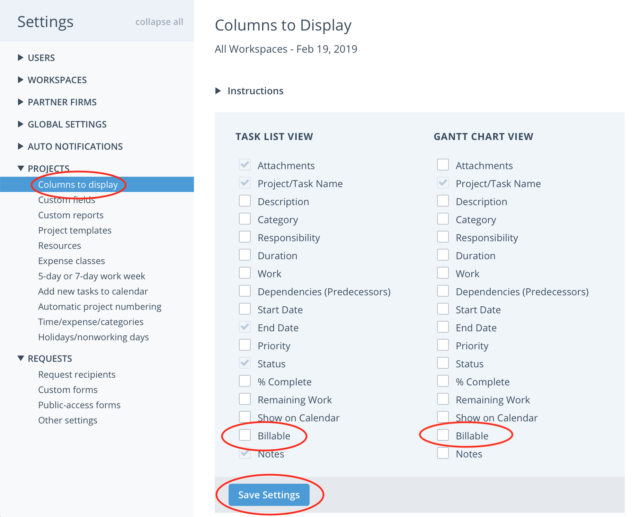
For even greater visibility into which projects are Billable or Not Billable, and to make toggling more accessible, an Administrator can enable the Billable column to display on the main Task List (as well as the Gantt Chart). To display this column, visit the “Columns to display” page in the settings gear (when viewing ALL WORKSPACES) under PROJECTS, then click the checkbox to the left of the Billable checkbox(es) in the desired column(s), and click the blue “Save Settings” checkbox.
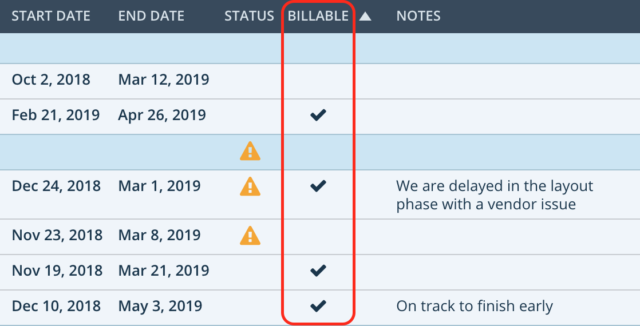
You can now click in the newly displayed column to check/uncheck whether a project is Billable:
Additionally, you can edit and change the Billable field for multiple projects at once.
Displaying projects designated Billable/Not billable
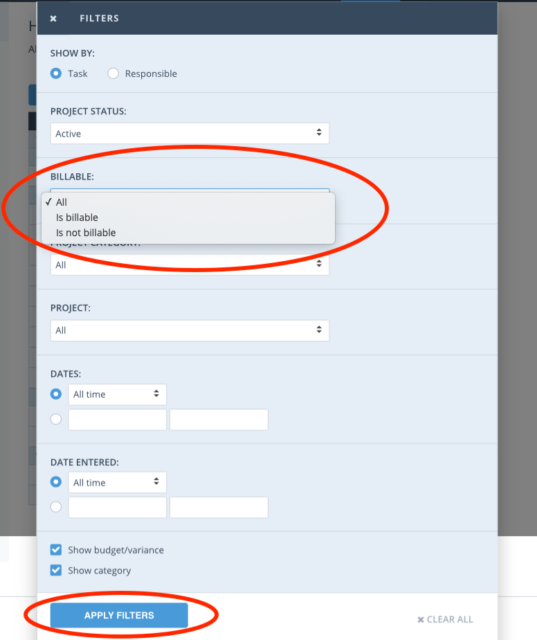
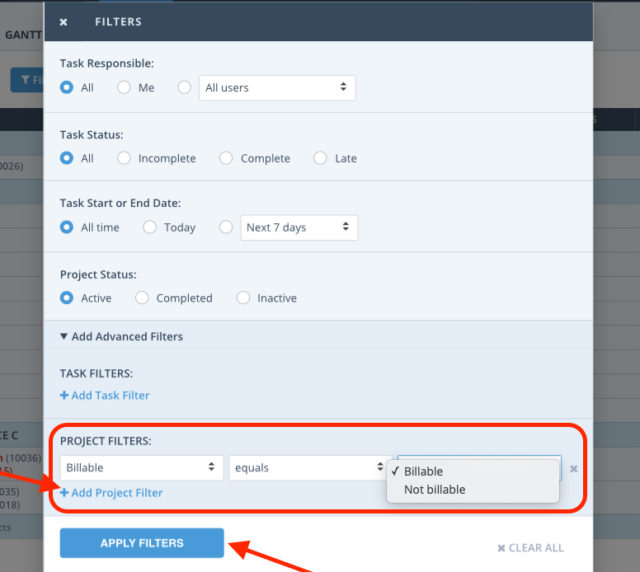
Time tracking reports can show projects (and their corresponding time entries) that are set as Billable, Not billable, or both (All). To display certain billable or not billing projects in the contents of a report , select the blue Filters button, then select the Billable designation you’d like to view and click the blue “APPLY FILTERS” button.
The main Task List view of Projects can also display projects with a particular Billable designation. Start by clicking the blue “Filters” button on the Task List, then select the blue “+ Add Project Filter” link and select “Billable” from the left dropdown that appears, then choose Billable or Not billable from the dropdown on the right and click the blue “APPLY FILTERS” button.
Note: The Billable/Non Billable designation for projects is only visible when Time Tracking is enabled.